
Welcome to the All American 921 Pressure Canner Manual, your comprehensive guide to safe and effective home canning. This manual provides detailed instructions, safety tips, and best practices for using the All American 921, ensuring a successful canning experience for both beginners and experienced users. Discover how to harness the power of pressure canning to preserve fresh foods, explore new recipes, and maintain healthy eating habits year-round. Designed with durability and ease of use in mind, the All American 921 is a trusted tool for home canning enthusiasts.

Safety Precautions and Guidelines
Safety is paramount when using the All American 921 Pressure Canner. Always read the manual thoroughly before operation to understand proper procedures and precautions. Never leave the canner unattended during use, as high-pressure conditions require constant monitoring. Ensure the canner is placed on a stable, heat-resistant surface away from children and pets. Proper ventilation is essential to prevent steam buildup. Avoid overfilling jars, as this can lead to seal failure or jar breakage. Regularly inspect the gasket and other components for wear and tear, replacing them as needed. Never force the lid open; allow natural cooling and depressurization. Follow recommended pressure levels and processing times to ensure food safety. Always handle hot jars with care, using oven mitts or tongs. By adhering to these guidelines, you can enjoy safe and successful canning experiences.

Understanding the Components of the All American 921
The All American 921 Pressure Canner is built with durable, heavy-duty construction, featuring a Premium 18/8 Stainless Steel body that ensures long-lasting performance. Key components include the locking lid, which secures tightly for safe pressure sealing, and the replaceable gasket, which guarantees an airtight seal during operation. The pressure gauge provides accurate readings, while the overpressure plug acts as a safety mechanism to prevent excessive pressure buildup. Additional features include a sturdy handle for easy lifting and two cooking racks for efficient food processing. The canner also comes with an instruction manual and recipe book, offering guidance and inspiration for your canning journey. Understanding these components ensures optimal use and maintenance of your All American 921.
Comparing Models: All American 921 vs. 925
The All American 921 and 925 pressure canners share many similarities but differ in key features. The All American 925 has a larger liquid capacity, holding 3.5 quarts more than the 921, making it ideal for bulk canning. It also includes an additional cooking rack, providing greater versatility for processing multiple jars. Both models feature a durable stainless steel construction, weighted pressure control, and a replaceable gasket. The 921 is more compact and lightweight, suitable for smaller kitchens or those new to canning. The 925, with its higher capacity, is preferred by experienced users needing to process larger quantities. Both models are trusted for their reliability and safety features, ensuring high-quality canning results.
Installation and Setup Guide
Before using your All American 921 Pressure Canner, carefully unpack and inspect all components, including the canner, lid, gasket, and racks. Ensure no damage occurred during shipping. Place the canner on a stable, heat-resistant surface, ideally your stovetop. Familiarize yourself with the pressure gauge, safety lock, and other essential features. Thoroughly wash the canner and racks with mild soap and warm water before first use. Position the canner securely on your burner, ensuring it is level and balanced. Review the manual to understand the assembly and operation of the gasket and pressure regulator. These steps ensure safe and effective use of your pressure canner for home canning. Always follow the manufacturer’s guidelines for setup to guarantee optimal performance and longevity.
Operating Instructions for the All American 921
Preheat the canner with 2–3 inches of water. Secure the lid, monitor pressure, and process food as directed. After processing, allow the canner to cool naturally before depressurizing and removing jars. Always follow safety guidelines for optimal results.
6.1. Preparing the Pressure Canner
Before use, ensure the All American 921 is clean and free from debris. Place the canner on a heat-resistant surface and add 2–3 inches of fresh, clean water. Position the rack at the bottom to prevent jars from direct heat contact. Inspect the gasket and sealing ring for wear or damage; replace if necessary. Align the lid properly, ensuring the handles are securely locked. Check all vents and valves for blockages. Preheat the canner over medium heat until steam begins to escape steadily. This step ensures proper function and prepares the unit for safe pressurization. Always follow the manual’s guidelines for water levels and preparation to avoid mishaps during processing.
6.2. Processing Food
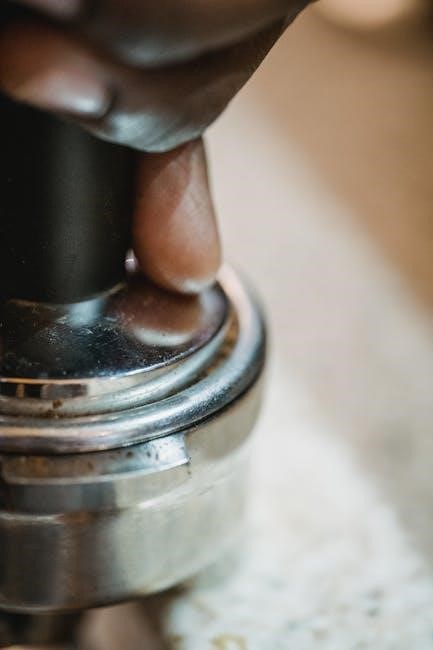
Once the pressure canner is preheated, carefully place the prepared jars onto the rack, ensuring they are not overcrowded. Secure the lid, aligning the handles properly, and turn the wingnut to lock it in place. Gradually increase the heat to achieve the recommended pressure level, monitoring the gauge closely. Once the desired pressure is reached, regulate the heat to maintain consistent pressure throughout processing. Processing times vary based on the type of food, altitude, and recipe instructions; Always refer to the manual or a trusted canning guide for specific guidelines. After the processing time ends, reduce heat gradually and allow the canner to cool naturally until the pressure returns to zero. Avoid rushing the cooling process to ensure jars seal properly and maintain food safety. Follow these steps meticulously for optimal results and to preserve the quality of your canned goods.
6.3. Cooling and Depressurization
After processing, turn off the heat and allow the canner to cool naturally. Do not attempt to accelerate cooling by opening the vent or pouring water on the canner, as this could lead to improper sealing or jar damage. Wait until the pressure gauge returns to zero and the vent no longer releases steam. This step is critical for ensuring jars seal properly and maintaining food safety. Once depressurized, carefully remove the lid, tilting it away from you to avoid steam burns. Allow the jars to rest in the canner for 5-10 minutes before removing them. This cooling phase ensures seals form correctly and prevents liquid loss. Always follow the manual’s guidelines for depressurization to achieve the best results.
6.4. Removing Jars from the Canner
Once the canner has cooled and depressurized, use oven mitts or tongs to carefully lift each jar from the canner. Keep the jars upright to prevent liquid from spilling. Place them on a heat-resistant surface, such as a towel or cooling rack, leaving about 1 inch of space between each jar to allow for proper cooling. Avoid touching the hot jars or lids with bare hands. Let the jars cool to room temperature, undisturbed, for 12-24 hours. This allows the seals to set properly. After cooling, check the seals by pressing on the top of each jar; if the lid does not move and is concave, the seal is successful. Store sealed jars in a cool, dark place for later use.

Common Canning Terms and Definitions
Understanding key terms is essential for successful pressure canning. Pressure Canning refers to the process of heating food in a sealed container to achieve high temperatures for sterilization. Sealing occurs when the lid forms a vacuum-tight barrier, preventing contamination. Vacuum Seal ensures no air remains in the jar, crucial for preservation. Headspace is the space between the food and jar lid, necessary for expansion. Acidic Foods (like fruits) require less processing time, while Low-Acid Foods (meats, vegetables) need higher temperatures to kill bacteria. Altitude Adjustment is required for areas above 1,000 feet to ensure proper sterilization. Gauge refers to the device measuring pressure in the canner. These terms are vital for safe and effective canning practices using the All American 921.
Maintenance and Care Tips
Regular cleaning, thorough drying, and proper storage in a cool, dry place are essential for maintaining the All American 921. Inspect gasket and gauge regularly for wear.
8.1. Cleaning the Pressure Canner
Cleaning your All American 921 Pressure Canner is essential for maintaining its performance and longevity. After each use, wash the canner with mild soap and warm water. Avoid abrasive cleaners or scourers, as they may damage the finish or gasket. Rinse thoroughly and dry with a clean towel. Pay special attention to the gasket, lid, and vent pipe, ensuring no food residue remains. For tough stains, soak the parts in warm soapy water before scrubbing gently. Regular cleaning prevents rust and bacterial growth, ensuring your canner remains in optimal condition for future use. Always refer to the manual for specific cleaning instructions tailored to your model.
8.2. Storage and Longevity
Proper storage is crucial for extending the life of your All American 921 Pressure Canner. After cleaning, ensure the canner is completely dry to prevent rust. Store it in a cool, dry place away from direct sunlight and moisture. Use a breathable cover to protect it from dust but avoid sealing it in plastic, which can trap humidity. If storing for an extended period, consider applying a thin layer of food-safe oil to the metal components to prevent corrosion. Always check the gasket and seals for wear before reuse. By following these storage tips, you can maintain your pressure canner in excellent condition for years of reliable service.
Troubleshooting Common Issues
Troubleshooting your All American 921 Pressure Canner ensures optimal performance and safety. Common issues include the lid not sealing properly, excessive steam escaping, or the pressure gauge malfunctioning. If the lid doesn’t seal, inspect the gasket for wear or misalignment. For steam leaks, check the vent pipe and ensure it’s clear of blockages. If the pressure gauge isn’t accurate, refer to the manual for calibration instructions or contact customer support. Regularly cleaning the canner and replacing worn parts can prevent many issues. Always follow the manufacturer’s guidelines for troubleshooting to avoid safety hazards. If problems persist, consult the manual or reach out to the manufacturer for assistance. Proper maintenance and quick issue resolution will extend the life of your pressure canner and ensure reliable results.

Recipes and Cooking Ideas Using the All American 921
The All American 921 Pressure Canner opens up a world of creative cooking and canning possibilities. From hearty stews and soups to fresh vegetables and meats, this appliance allows you to prepare nutritious meals year-round. Try canning homemade sauces, jams, or relishes for a personalized touch. For a hearty meal, pressure-can hearty beef stew or tender chicken with vegetables. The manual also includes recipes for preserving fish, beans, and grains, ensuring a diverse pantry. Experiment with international flavors by canning curries or chili. The All American 921 is perfect for low-sodium diets, as you control the seasoning. With its robust design, you can create endless recipes while maintaining food safety and quality. Expand your culinary horizons and enjoy homemade, preservative-free meals with ease.

Pressure Canning Basics and Best Practices
Pressure canning is a reliable method for preserving food, ensuring safety, and retaining nutrients. Always follow tested recipes and guidelines to avoid spoilage and foodborne illness. Start by sterilizing jars, lids, and utensils in boiling water. Pack food evenly, leaving the recommended headspace to allow for expansion. Use a pressure canner like the All American 921 to achieve the necessary temperatures and pressures. Monitor the pressure gauge closely and adjust heat as needed to maintain the correct setting. Processing times vary based on altitude and food type, so consult the manual for specific instructions. Never skip the cooling and depressurization steps to ensure proper sealing. Regularly inspect jars for signs of spoilage before storage. By adhering to these basics and best practices, you can enjoy safe, homemade canned goods all year round.
History of All American Pressure Canners
The All American Pressure Canner has a long-standing reputation for reliability and durability, making it a trusted name in home canning. First introduced decades ago, the brand quickly gained popularity for its high-quality, made-in-the-USA products. The All American 921 and 925 models, in particular, have become staples in many households due to their robust construction and ease of use. Known for their weighted-gauge design, these pressure canners have set a standard for safety and efficiency in food preservation. Over the years, the brand has evolved to meet the needs of modern canning enthusiasts while maintaining its commitment to traditional values. Today, All American Pressure Canners remain a favorite among experienced canners and newcomers alike, preserving the art of home food preservation for future generations.
Where to Find the Manual and Additional Resources
The All American 921 Pressure Canner Manual is readily available online as a downloadable PDF. You can access it directly from the manufacturer’s official website or trusted sources like Fantes. Additionally, various online forums and cooking communities share user manuals, recipes, and troubleshooting guides specifically for the All American 921. For further assistance, visit the manufacturer’s support page or explore resources like Pressure Canning Basics and Canning Terms to enhance your understanding. If you’re unable to find the manual online, contact customer support or check with retailers who sell the All American 921 for a physical copy. These resources ensure you have everything needed to maximize your pressure canning experience.