LEGO Mixels Krog Instructions: A Comprehensive Guide
Welcome, LEGO enthusiasts! This detailed guide unlocks the secrets to building Krog, the formidable Nixel King, from the vibrant LEGO Mixels universe.
Prepare for an immersive journey, navigating through each construction phase with clarity and precision, ensuring a rewarding building experience.
Explore the intricacies of Krog’s design, mastering techniques to bring this iconic character to life, and discover how to combine him with other Mixels!
Recent LEGO game releases, like LEGO Party! and LEGO Voyagers, demonstrate the enduring appeal of LEGO’s creative potential.
Furthermore, updates to existing titles, such as LEGO Jurassic World and LEGO Batman, highlight the ongoing support and evolution within the LEGO gaming community.
These developments underscore the excitement surrounding LEGO builds, including the captivating challenge of assembling Krog.
This guide will provide step-by-step instructions, troubleshooting tips, and insights into Krog’s role within the broader Mixels world, ensuring a successful build.
Dive into the colorful world of Mixels! These quirky, collectible creatures, born from a collaboration between LEGO and Cartoon Network, represent a unique blend of building and storytelling.
Mixels are tribal beings, each possessing distinct personalities and building styles, encouraging creative combination and imaginative play.
The core concept revolves around “mixing” different Mixels to create new, powerful forms, fostering endless possibilities for builders of all ages.
Within this vibrant universe resides Krog, the imposing leader of the Nixels. Unlike the collaborative Mixels tribes, the Nixels are mischievous and chaotic, dedicated to dismantling and disrupting the peaceful existence of others.
Recent LEGO game updates, like those for LEGO Batman, demonstrate the ongoing evolution of LEGO characters and storylines, mirroring the dynamic nature of the Mixels universe.
Krog embodies this disruptive force, making him a compelling and challenging build for LEGO enthusiasts.
His construction is a testament to LEGO’s design ingenuity, offering a rewarding experience for builders eager to embrace the Nixel’s rebellious spirit.
What are LEGO Mixels?
LEGO Mixels are small, buildable characters introduced in 2014, representing a unique departure from traditional LEGO sets. They are designed for quick construction and encourage imaginative play through combination. Each Mixel belongs to a tribe, characterized by a specific color scheme, building style, and personality. These tribes often clash, creating dynamic narratives and building challenges.
Unlike larger LEGO sets focused on detailed models, Mixels prioritize playability and collectibility. The sets are relatively inexpensive, making it easy to amass a diverse collection of tribes. This aligns with the spirit of recent LEGO releases, like LEGO Party!, which emphasize fun and accessibility. The core mechanic involves “mixing” – connecting two or three Mixels to form a larger, more powerful “MAX” form.
This encourages experimentation and creativity, fostering a vibrant community of builders and collectors. They represent a playful intersection of physical building and digital storytelling.
Understanding the Mixels Universe
The Mixels universe is a vibrant, digital world brought to life through animated shorts, online games, and, of course, LEGO sets. It’s populated by tribes constantly competing for “cubits,” mysterious energy sources that fuel their powers and technology. These tribes, like the Glorp Corp, Frosticon, and Pyrax, each possess distinct characteristics and building styles, mirroring their environments and personalities.
The ongoing conflicts and alliances between tribes drive the narrative, creating a dynamic and engaging world. This echoes the collaborative spirit seen in newer LEGO titles like LEGO Voyagers, where teamwork is essential. The universe is designed to be playful and humorous, appealing to a broad audience. Updates to games like LEGO Batman demonstrate a commitment to evolving these worlds.
Understanding this context enhances the building experience, allowing builders to embody the spirit of each tribe and their ongoing struggles.
Krog: The Nixel King
Krog stands as the supreme ruler of the Nixels, a chaotic tribe obsessed with dismantling and absorbing other Mixel tribes. Unlike the structured societies of tribes like the Glorp Corp, the Nixels thrive on disorder, and Krog embodies this perfectly. He’s a formidable antagonist, constantly scheming to expand his power and control over the Mixels universe.
His imposing stature and menacing design reflect his authority and destructive tendencies. Building Krog allows you to recreate this iconic villain, understanding his role as a central figure in the Mixels narrative. Recent LEGO game updates, like those for LEGO Jurassic World, show a dedication to detailed character representation.
Krog’s ambition and relentless pursuit of power make him a compelling character within the playful chaos of the Mixels world.
Krog’s Unique Characteristics
Krog distinguishes himself with a striking, asymmetrical design, reflecting the chaotic nature of the Nixels. His build incorporates dark purple and black elements, conveying a sense of menace and power. The prominent crown atop his head symbolizes his reign as the Nixel King, a constant reminder of his authority.
Unlike the more uniformly colored Mixels, Krog features a diverse range of textures and shapes, adding to his intimidating presence. This complexity makes him a rewarding build, challenging builders to recreate his unique form. The recent release of LEGO Voyagers demonstrates the continued focus on intricate character designs.
Krog’s jagged edges and imposing silhouette perfectly capture his role as the primary antagonist, a force of disruption in the Mixels universe.

Building Krog: Step-by-Step Instructions
Embark on Krog’s construction! We’ll guide you through each phase, from assembling the legs to finalizing the crown, ensuring a smooth and enjoyable building process.
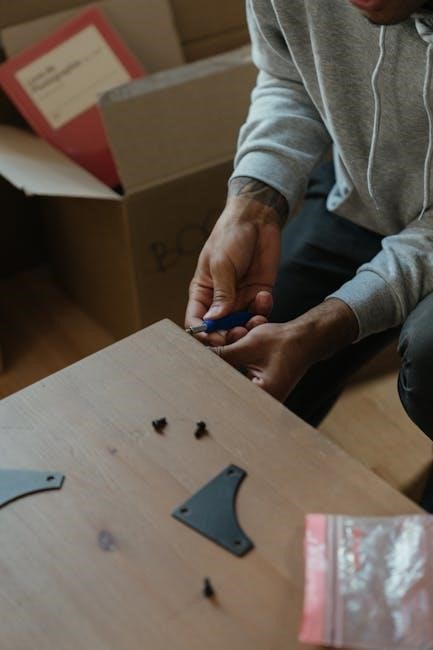
Gathering the Necessary LEGO Pieces
Before commencing Krog’s assembly, meticulous preparation is key. Ensure you have all required LEGO elements readily available to avoid interruptions during the build. While specific piece counts vary depending on the set, generally, Krog requires a diverse assortment of bricks, plates, slopes, and specialized parts characteristic of the Mixels line.
Carefully inventory the contents of your LEGO Mixels set, cross-referencing against an official parts list (often found online or within the set’s instruction manual). Pay close attention to smaller components, as these are easily misplaced. Recent LEGO game updates, like those for LEGO Batman, emphasize the importance of complete inventories for optimal gameplay, mirroring the need for a full parts list here.
Organize your LEGO pieces by type and color to streamline the building process. This proactive approach, similar to managing assets in LEGO Marvel’s Avengers, will significantly enhance efficiency and reduce frustration. Having everything at your fingertips will make constructing the Nixel King a truly rewarding experience.
Step 1: Constructing Krog’s Legs
Begin Krog’s construction by focusing on his sturdy legs, the foundation of his imposing stature. Start with two 2×2 brick foundations, layering with slopes to create a slightly angled base. This angle is crucial for Krog’s distinctive, somewhat hunched posture. Utilize dark grey or black LEGO pieces to accurately reflect his color scheme, as seen in official Mixels imagery.
Next, attach Technic pins to the leg structures, preparing for connection to the torso in later steps. Ensure these pins are securely fastened; a stable connection is vital, mirroring the structural integrity emphasized in games like LEGO Builders Journey. Add additional plates and bricks to build upwards, forming the upper leg sections.
Finally, incorporate hinge elements to allow for limited leg articulation, enhancing playability. Remember, precision is key – a solid leg foundation ensures Krog’s overall stability, much like a well-built base in LEGO Jurassic World.
Step 2: Building Krog’s Torso
Now, assemble Krog’s powerful torso, the central component of his design. Begin with a core structure of 2×4 bricks, layering with plates to create a broad chest. Utilize dark grey and black pieces, maintaining consistency with the leg construction. Integrate Technic bricks with holes to accommodate arm attachments, ensuring a secure fit – stability is paramount, akin to building in LEGO Batman.
Add angled plates to the sides of the torso, shaping Krog’s characteristic bulky form. Incorporate a central 2×2 plate with a stud for head attachment, preparing for the next construction phase. Reinforce the structure with internal bracing, preventing any potential weak points.
Finally, ensure the torso’s connection points align perfectly with the completed legs, guaranteeing a stable and balanced overall build. A robust torso is essential for showcasing Krog’s imposing presence.
Step 3: Assembling Krog’s Arms
Construct Krog’s formidable arms, mirroring the dark grey and black color scheme of his legs and torso. Begin with a base of 1×2 bricks, extending outwards with Technic beams to create a robust arm structure. Utilize hinge joints to allow for posing and dynamic movement, similar to character customization in LEGO Marvel’s Avengers.
Attach claw-like hands using specialized LEGO pieces, ensuring a secure grip. Reinforce the arm connections with additional plates and bricks, preventing any instability during play. Pay close attention to symmetry, ensuring both arms are identical in length and shape.
Finally, connect the completed arms to the torso’s Technic connection points, verifying a firm and stable attachment. Properly assembled arms are crucial for completing Krog’s imposing silhouette.
Step 4: Creating Krog’s Head and Crown
Now, focus on Krog’s menacing head and regal crown! Begin with a core structure of angled plates, forming the basic head shape. Utilize dark purple and black bricks to capture Krog’s distinctive coloration. Incorporate a 1×2 tile with a printed eye design for a fierce expression, reminiscent of character details in LEGO Batman.
The crown is constructed separately, using gold and dark grey pieces. Employ wedge plates and slopes to create a jagged, imposing crown shape. Securely attach the crown to the top of Krog’s head, ensuring it sits firmly in place.
Finally, connect the completed head to the torso via a Technic connection, verifying a stable and secure fit. Krog’s head and crown complete his fearsome appearance!

Krog’s Combinations with Other Mixels
Unleash Krog’s potential! Combine him with fellow Mixels like Camillot, Floatie, and Zorch to create powerful Mix creations, expanding play possibilities and fun!
Krog & Camillot Combination
The Krog & Camillot Mix, known as “Krogillot,” is a formidable fusion, blending Krog’s Nixel strength with Camillot’s avian agility. This combination results in a powerful, winged warrior, boasting enhanced offensive capabilities and increased maneuverability. The build involves strategically integrating Camillot’s parts onto Krog’s core structure, primarily focusing on the back and arms to create functional wings.
Expect a slightly altered aesthetic, with Camillot’s vibrant colors complementing Krog’s darker tones. This mix excels in aerial combat scenarios, utilizing its wings for swift attacks and evasive maneuvers. Recent LEGO game updates, like those for LEGO Batman, demonstrate the importance of character customization, mirroring the creative freedom offered by Mixels combinations. Successfully combining Krog and Camillot requires careful alignment of connection points, ensuring a stable and visually appealing final product. This mix is a testament to the dynamic possibilities within the Mixels universe!
Krog & Floatie Combination
The Krog & Floatie Mix, resulting in “Krogfloat,” creates a surprisingly buoyant and unpredictable combination. Floatie’s aquatic nature merges with Krog’s imposing stature, yielding a character capable of both land-based dominance and limited water traversal. The build focuses on attaching Floatie’s buoyant elements – primarily the large, rounded pieces – to Krog’s legs and torso, creating a somewhat unstable, yet intriguing, form.
Visually, Krogfloat presents a striking contrast, with Floatie’s bright, aquatic colors offsetting Krog’s darker palette. While not designed for sustained flight, Krogfloat can achieve brief periods of hovering or gliding. The recent release of LEGO Voyagers highlights the potential for cooperative builds, mirroring the collaborative spirit of Mixels combinations. Achieving a stable Krogfloat requires precise piece placement, compensating for Floatie’s inherently unbalanced design. This mix embodies the playful experimentation at the heart of the Mixels line!
Krog & Zorch Combination
The fusion of Krog and Zorch, forming “Krozorch,” unleashes a fiery and formidable Mixel. Zorch’s flame-based components integrate with Krog’s robust structure, resulting in a character radiating power and aggression. The build centers around incorporating Zorch’s translucent orange pieces – representing flames – onto Krog’s arms and head, creating a visually striking and intimidating appearance. This combination emphasizes offensive capabilities, reflecting both characters’ inherent strengths.
Krozorch boasts enhanced durability and a menacing aesthetic. The recent updates to LEGO Batman demonstrate the importance of character customization, a theme echoed in the Mixels combinations. Achieving a secure connection between Zorch’s flame elements and Krog’s frame is crucial for stability. Krozorch’s design embodies the chaotic energy of the Mixels universe, offering a powerful and visually impressive addition to any Mixel collection. It’s a truly explosive pairing!

Troubleshooting Krog Construction
Encountering difficulties? This section provides solutions for missing pieces, stubborn connections, and ensuring Krog’s structural integrity, mirroring fixes found in LEGO Marvel’s Avengers.

Missing LEGO Pieces: Solutions
Don’t panic! Missing LEGO pieces are a common challenge, even with recent game-related LEGO sets like those featured in LEGO Batman updates. First, carefully retrace your building steps, checking the floor and surrounding areas – small pieces easily roll away.
If the piece remains elusive, utilize the BrickLink website (referenced in online LEGO communities) – a vast marketplace for individual LEGO parts. You can search by part number or description to locate the exact piece needed. Alternatively, contact LEGO Customer Service; they are often willing to send replacement parts, especially for newer sets.

Consider temporarily substituting a similar piece from your LEGO collection to continue building, noting the replacement for later correction. Remember, the LEGO community forums are excellent resources for identifying parts and finding solutions, mirroring the collaborative spirit seen in LEGO Voyagers.
Difficult Connection Points
Encountering resistance? Some connections during Krog’s construction might feel tighter than others. Avoid forcing pieces – excessive pressure can damage the LEGO bricks. Gently wiggle the parts while applying even pressure; a slight adjustment in angle often resolves the issue.

Inspect the connection points for any obstructions, like dust or small debris. A soft brush or compressed air can help clear these. If a connection remains stubbornly difficult, double-check the instructions to ensure you’re aligning the pieces correctly. Remember, precision is key, much like the detailed builds in LEGO Jurassic World.
Utilize a LEGO brick separator tool (available separately or in LEGO sets) to carefully pry apart stubborn connections. Patience is crucial; avoid using excessive force. Online tutorials, similar to those for LEGO Marvel’s Avengers, can visually demonstrate proper techniques.
Ensuring Structural Stability
A sturdy Krog is a happy Krog! Once assembled, gently test Krog’s structural integrity. Pay close attention to the leg and torso connections, as these bear the most weight. Ensure all pieces are firmly attached, mirroring the robust builds seen in LEGO Voyagers.
If any sections feel loose, retrace your steps and verify the connections. Slight adjustments can make a significant difference. Avoid overly aggressive play immediately after building; allow the structure to settle. Remember, even updates to LEGO Batman require stable foundations!
Consider the center of gravity. Krog’s crown adds height, potentially making him top-heavy. Distribute weight evenly during play. If instability persists, review the build instructions for alternative bracing techniques. A well-built Krog will withstand countless Nixel battles!

Beyond the Build: Krog in the Mixels World

Dive deeper into the Mixels narrative! Explore Krog’s pivotal role, his complex motivations, and dynamic interactions with rival tribes, enriching your LEGO experience.
Krog’s Role in the Mixels Series
Krog stands as the primary antagonist within the LEGO Mixels universe, relentlessly pursuing the capture of Cubits – the vital energy source fueling the Mixels tribes. As the self-proclaimed Nixel King, he commands the Nixels, a mischievous and chaotic group dedicated to disrupting the peaceful existence of the Mixels.
His overarching goal isn’t necessarily destruction, but rather control; Krog desires to harness the power of Cubits to expand his dominion and impose order (albeit a rather chaotic one) upon the Mixels world. He frequently orchestrates elaborate schemes and employs cunning tactics to achieve his objectives, often leading to humorous and action-packed confrontations.
Recent LEGO game updates, like those for LEGO Batman, demonstrate the ongoing narrative development within the LEGO ecosystem, mirroring the dynamic storylines found in the Mixels series. Krog’s presence consistently drives the plot forward, challenging the Mixels and forcing them to combine their powers to overcome his schemes.
Krog’s Personality and Motivations
Krog embodies a delightfully villainous persona, characterized by arrogance, impatience, and a penchant for dramatic pronouncements. He views the Mixels as inferior beings, obstacles to his grand ambitions, and frequently belittles them with sarcastic remarks. Despite his menacing demeanor, Krog often displays a comical ineptitude, with his plans frequently backfiring due to the Nixels’ incompetence.
His primary motivation stems from a deep-seated desire for power and control. Krog believes that only he can bring order to the Mixels world, though his definition of “order” is decidedly self-serving. He’s driven by a need to prove his superiority and establish himself as the ultimate ruler.
Similar to character development in recent LEGO titles like LEGO Voyagers, Krog’s personality isn’t entirely one-dimensional. Hints of insecurity and frustration occasionally surface, suggesting a more complex character beneath the bluster.
Krog’s Interactions with Other Tribes
Krog’s interactions with the other Mixel tribes are consistently antagonistic, fueled by his belief in Nixel supremacy. He views the Infernites, Frosticons, Glorp Corps, and Mudlunks as annoyances to be crushed or exploited. His strategies typically involve attempts to steal their energy or disrupt their habitats, often with chaotic and humorous results.
He particularly clashes with the Infernites, whose fiery energy he covets, and the Frosticons, whose icy powers he deems a threat to his dominion. Interactions with the Glorp Corps are marked by disgust, while the Mudlunks are largely dismissed as insignificant.
Much like the dynamic character interactions found in games like LEGO Batman, Krog’s relationships are defined by conflict. However, these conflicts often serve as comedic relief within the Mixels narrative, highlighting the absurdity of his ambitions.

Resources for LEGO Mixels Fans
Expand your Mixels journey! Discover official LEGO resources, vibrant online communities, and helpful video tutorials for building Krog and exploring the Mixels universe further.
Official LEGO Mixels Website
Dive into the official LEGO Mixels online hub! While a dedicated, actively maintained Mixels website is no longer prominently featured on LEGO’s main site, valuable resources remain accessible through LEGO’s archive and community pages. These pages often contain character profiles, including detailed information about Krog, his abilities, and his place within the Nixel tribe.
Historically, the official site hosted building instructions for all Mixels, including Krog, though these are now often found through fan-created resources (see below). LEGO’s broader website continues to showcase the spirit of creative building, exemplified by recent releases like LEGO Party! and LEGO Voyagers, inspiring builders of all ages.
Keep an eye on LEGO’s news section for potential re-releases or promotions related to Mixels, as the brand occasionally revisits beloved themes. Exploring LEGO’s general support pages can also provide assistance with piece identification if you encounter missing parts during Krog’s construction.
Online Communities and Forums
Connect with fellow LEGO Mixels enthusiasts! Numerous online communities and forums are dedicated to sharing building tips, troubleshooting challenges, and showcasing custom creations, particularly for sets like Krog. Eurobricks and Brickset are excellent starting points, offering dedicated Mixels threads and active user bases.
Reddit’s LEGO subreddit (/r/lego) frequently features Mixels discussions, and dedicated Mixels fan groups on platforms like Facebook provide a space for sharing builds and seeking assistance. These communities are invaluable for finding alternative building instructions, sourcing missing pieces, and discovering innovative combination ideas beyond the official sets.
Given recent LEGO game updates (Jurassic World, Batman), these forums also discuss related digital builds and modifications. Remember to respect community guidelines and contribute positively to these vibrant spaces!
LEGO Mixels Video Tutorials
Visual learners rejoice! A wealth of LEGO Mixels video tutorials are readily available on platforms like YouTube, offering step-by-step guidance for building Krog and other Mixels characters. Search for “LEGO Mixels Krog build” to find numerous creators demonstrating the construction process.
These tutorials often provide close-up views of connection points, helpful tips for overcoming tricky steps, and alternative building techniques. Many creators also showcase Krog’s combinations with other Mixels, providing inspiration for your own creations. Considering recent LEGO game content (LEGO Party!, Voyagers), these videos often mirror the creative spirit of LEGO gaming.
Look for channels specializing in LEGO speed builds or detailed instructionals for the most efficient and informative experience. Don’t hesitate to pause, rewind, and re-watch sections as needed!