Singer sewing machine manuals provide comprehensive guides for operation, maintenance, and troubleshooting, ensuring optimal use of your Singer sewing machine, from basic to advanced models.
Overview of Singer Sewing Machine Manuals
Singer sewing machine manuals are comprehensive guides designed to help users understand and operate their machines effectively. These manuals cover a wide range of models, from classic mechanical machines like the Singer 15-91 to modern computerized models such as the Singer 9960 Quantum Stylist. They include detailed instructions for setup, maintenance, troubleshooting, and advanced sewing techniques. Available in multiple languages, including English, French, and Spanish, these manuals ensure accessibility for a global audience. Many are available as free PDF downloads from Singer’s official website or third-party sources, making them easily accessible for users worldwide.
Importance of Using Official Singer Manuals
Official Singer sewing machine manuals are essential for ensuring proper operation, safety, and maintenance of your machine. They provide accurate, detailed instructions tailored to specific models, reducing the risk of errors or damage. These manuals include safety guidelines, troubleshooting tips, and warranty information, ensuring compliance with manufacturer standards. By using official manuals, users can maximize their machine’s performance and longevity. Singer’s commitment to the Green Initiative has made these manuals exclusively available online, promoting environmental sustainability while maintaining easy accessibility for all users worldwide.
Downloading Singer Sewing Machine Manuals
Singer sewing machine manuals are easily downloadable from Singer’s official website and third-party sources, offering free access to guides for models like Heavy Duty and Quantum Stylist, aligning with Singer’s Green Initiative to reduce environmental impact.
Official Sources for Singer Manuals
The official Singer website provides direct access to free downloadable PDF manuals for various sewing machine models, including Heavy Duty, Quantum Stylist, and vintage models like the Singer 15-91 and 201K. Singer has embraced the Green Initiative, making manuals exclusively available online to reduce environmental impact. Users can visit Singer’s official support page to find and download manuals, stitch guides, and updates for their specific models. This convenient service ensures easy access to essential information for optimal machine performance and maintenance.
Third-Party Websites for Manual Downloads
Besides the official Singer website, third-party platforms like ManualsDir.com and ManualsLib offer extensive collections of Singer sewing machine manuals. These sites provide free PDF downloads for various models, including older and discontinued ones. Users can search by model number or product name to find the specific manual they need. Additionally, some forums and sewing communities share scans of original Singer manuals, making them accessible to those who may have lost their physical copies. These resources are invaluable for enthusiasts and professionals alike, ensuring continued access to essential guidance.
Popular Singer Sewing Machine Models and Their Manuals
Popular Singer models like the Singer 4452 Heavy Duty and Singer 9960 Quantum Stylist have their manuals readily available for download, catering to both beginners and professionals.
Heavy Duty Models (e.g., Singer 4452)
The Singer 4452 Heavy Duty sewing machine is known for its durability and versatility, making it ideal for heavy-duty sewing projects. Its manual provides detailed instructions for setup, maintenance, and troubleshooting. Available as a free PDF download, the manual includes guides for advanced features like multiple stitch options and automatic threading. Perfect for both beginners and experienced sewers, the Singer 4452 manual ensures optimal performance and longevity of the machine. Its comprehensive content helps users master various sewing techniques and understand the machine’s capabilities fully.
Quantum Stylist Models (e.g., Singer 9960)
The Singer 9960 Quantum Stylist is a high-end sewing machine offering advanced features and 600 built-in stitches; Its manual provides detailed guidance on operating the machine’s computerized interface and troubleshooting common issues. Available for free download as a PDF, the manual covers maintenance tips, accessory compatibility, and step-by-step operating instructions. It ensures users can fully utilize the machine’s capabilities, from basic sewing to intricate embroidery, making it an essential resource for both casual and professional sewers looking to optimize their creative projects with precision and ease;

Troubleshooting Common Issues
Singer sewing machine manuals offer solutions for resolving issues like thread breakage, machine jamming, and error codes, ensuring smooth operation with step-by-step guidance.
Mechanical Issues and Solutions
Common mechanical issues with Singer sewing machines include thread breakage, jamming, and uneven stitching. Solutions often involve checking thread tension, cleaning lint buildup, and ensuring proper needle alignment. Regular lubrication of moving parts can prevent friction-related problems. If the machine skips stitches, inspect the needle for damage or incorrect installation. For models with bobbin issues, ensuring the bobbin is correctly seated and threaded can resolve most problems. Referencing the manual’s troubleshooting section provides step-by-step guidance for diagnosing and fixing mechanical faults effectively.
Electronic and Computerized Machine Troubleshooting
For Singer’s electronic and computerized models, common issues include error codes, unresponsive touchscreens, and stitch selection problems. Resetting the machine or updating firmware often resolves these glitches. Ensure all connections are secure and consult the manual for specific error code meanings. Regular software updates can prevent compatibility issues. If the machine fails to power on, check the power cord and electrical connections. Referencing the troubleshooting guide in the manual provides detailed steps to address electronic malfunctions and restore functionality quickly and efficiently.
Maintenance and Care Tips
Regular cleaning, oiling, and proper storage are essential for extending the life of your Singer sewing machine. Follow manual guidelines for optimal care and performance.
Regular Cleaning and Lubrication
Regular cleaning and lubrication are crucial for maintaining your Singer sewing machine’s performance. Clean the bobbin area, feed dogs, and tension discs to remove lint and debris. Use a soft brush or cloth to wipe down surfaces. Lubricate moving parts as specified in your manual to ensure smooth operation. Avoid over-lubricating, as excess oil can attract dust. Proper maintenance prevents mechanical issues and extends the machine’s lifespan, keeping it in optimal working condition for years. Always refer to your Singer manual for specific cleaning and lubrication guidelines.
Replacing Parts and Accessories
Replacing parts and accessories for your Singer sewing machine ensures optimal performance and longevity. Use genuine Singer parts for compatibility and reliability. Common replacements include needles, bobbins, presser feet, and belts. Consult your manual for specific part numbers and installation instructions. Many Singer manuals, available online, provide detailed diagrams and guidance for replacing parts. Regularly checking and replacing worn components prevents machine damage and maintains stitching quality. Always follow safety guidelines when handling sharp objects like needles and blades during replacements.

Compatible Accessories and Parts
Singer sewing machine manuals highlight compatible accessories and parts, such as presser feet, bobbins, and needles, ensuring optimal performance and customization for various sewing projects.
Presser Feet and Specialty Attachments
Presser feet and specialty attachments are essential for enhancing your sewing experience. Singer sewing machine manuals detail various presser feet, such as all-purpose, zipper, and blind hem feet, designed for specific tasks. Optional attachments like walking feet and rufflers expand creative possibilities. These accessories are tailored to different models, ensuring compatibility and optimal performance. Manuals guide users in selecting the right tools for their projects, making sewing easier and more precise. Explore Singer’s range of presser feet and attachments to unlock new sewing capabilities.
Bobbins, Needles, and Thread Compatibility
Singer sewing machine manuals provide detailed guidance on compatible bobbins, needles, and threads for optimal performance. They specify recommended sizes and types for various models, ensuring proper tension and stitch quality. For instance, heavy-duty models like the Singer 4452 require robust needles and strong threads, while computerized models like the Singer 9960 may need specialized bobbin types. Manuals also cover thread material compatibility, such as cotton, polyester, or blends, to suit different fabrics. This ensures seamless sewing and prevents machine damage, enhancing your overall sewing experience.
Purpose and Benefits of Singer Manuals
Singer manuals guide users in setting up, operating, and maintaining their machines, enhancing sewing experiences through clear instructions, troubleshooting tips, and safety guidelines for optimal performance.
Understanding Machine Features
Singer sewing machine manuals play a crucial role in helping users understand their machine’s features. These guides provide detailed descriptions of various parts, functions, and settings, making it easier for sewists to navigate their equipment. From basic stitching options to advanced customization, the manuals break down complex features into simple, digestible information. Whether it’s explaining the purpose of different presser feet or highlighting the benefits of electronic controls, Singer manuals ensure users maximize their machine’s potential. Clear diagrams and step-by-step explanations further enhance comprehension, empowering users to explore all their machine’s capabilities confidently.
Step-by-Step Operating Guides
Singer sewing machine manuals offer detailed step-by-step operating guides, ensuring users can set up and operate their machines with ease. These guides cover everything from threading the machine and winding bobbins to selecting the right stitches for specific fabrics. Clear instructions and visual aids help users troubleshoot common issues and perform routine maintenance. Whether you’re a beginner or an experienced sewist, the guides provide a straightforward approach to mastering your Singer machine’s operations, helping you achieve professional results with every project.

Safety Precautions and Guidelines
Singer sewing machine manuals emphasize safety precautions, such as keeping fingers away from moving parts and ensuring proper ventilation to prevent accidents and maintain machine performance.
General Safety Tips
Always read the manual before using your Singer sewing machine to understand safety guidelines. Keep loose clothing and long hair tied back, and avoid wearing jewelry that could get caught in moving parts. Ensure the machine is placed on a stable, flat surface and keep children away while operating. Never touch electrical components with wet hands, and avoid overloading the machine. Regular maintenance, as outlined in the manual, is crucial for safe operation. Store the machine in a dry, cool place to prevent damage and ensure longevity.
Additionally, Singer manuals emphasize the importance of using genuine parts and avoiding unauthorized modifications. Proper ventilation is essential to prevent lint and dust buildup, which can cause mechanical issues. Follow the recommended threading techniques and never force fabric through the machine. By adhering to these general safety tips, you can ensure a safe and enjoyable sewing experience while maintaining your machine’s performance and durability over time.
Electrical Safety Measures
Ensure your Singer sewing machine is used with proper electrical safety. Keep the machine dry and avoid operating it with wet hands. Use only the original power cord provided and plug it into a grounded outlet. Never overload circuits or use damaged cords, as this can cause electrical hazards. Regularly inspect the power cord for signs of wear and replace it if necessary. Keep ventilation openings free from lint and dust to prevent overheating. Always unplug the machine when not in use or during maintenance to avoid accidental start-ups or electrical shocks.

Model-Specific Guides
Singer provides detailed manuals for specific models, ensuring tailored guidance for setup, maintenance, and troubleshooting, helping users optimize their sewing experience with precision and ease.
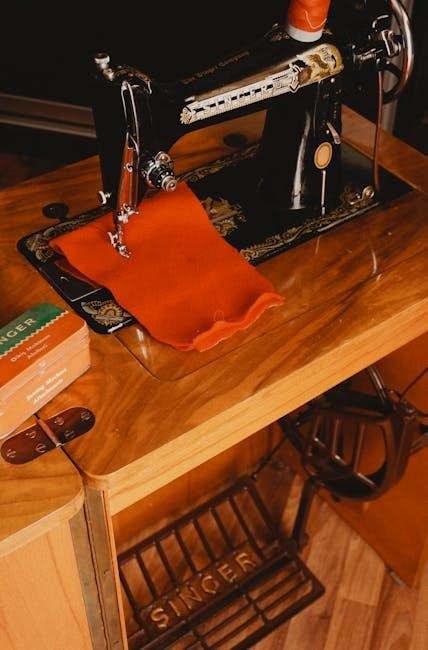
Singer 15-91 and 15K Series
The Singer 15-91 and 15K series are popular among sewists for their durability and versatility. These models, known for their mechanical simplicity, are ideal for both beginners and experienced users. Manuals for these series are widely available online, offering detailed instructions for setup, maintenance, and troubleshooting. They include guidance on threading, bobbin preparation, and stitch selection. Additionally, these manuals provide tips for optimizing machine performance and addressing common issues. Users can easily download PDF versions from official Singer websites or trusted third-party sources, ensuring uninterrupted sewing experiences. These resources are invaluable for maximizing the potential of these timeless machines.
Singer 201K and 99K Models
The Singer 201K and 99K models are renowned for their durability and ease of use, making them favorites among sewists. These machines feature mechanical simplicity and versatility, suitable for both basic and advanced sewing projects. Manuals for these models are readily available online, providing detailed guidance on operation, maintenance, and troubleshooting. They cover essential topics such as threading, bobbin preparation, and stitch selection. Additionally, these manuals offer tips for optimizing performance and addressing common issues, ensuring a seamless sewing experience for users of these classic machines.
Quick Start Guides
Quick Start Guides provide essential steps for setting up and operating Singer sewing machines, ensuring a smooth initial experience for users of all skill levels.
Basic Setup and First Use
The Quick Start Guide included with Singer sewing machines provides straightforward instructions for initial setup and first use. Begin by carefully unpacking and placing the machine on a stable surface. Plug in the power cord, ensuring it is securely connected. Familiarize yourself with the machine’s components, such as the spool pins, bobbin winder, and stitch selectors. Thread the machine as directed, ensuring proper tension and alignment. Insert the bobbin and pull up the bobbin thread. Test the machine by sewing a few stitches on scrap fabric to ensure everything is functioning correctly. This process ensures a smooth and confident start to your sewing journey.
Threading and Bobbin Preparation
Proper threading and bobbin preparation are essential for smooth operation. Begin by threading the machine as outlined in the manual, ensuring the thread follows the correct path and tension. For the bobbin, wind the thread evenly, avoiding overfilling. Insert the bobbin into the bobbin case, pulling the thread gently to secure it. Ensure both the top and bobbin threads are properly aligned and tensioned. This step-by-step process guarantees consistent stitching and prevents common issues like thread breakage or uneven fabric feeding.
Language Availability of Manuals
Singer sewing machine manuals are available in multiple languages, including English, French, and Spanish, ensuring accessibility for users worldwide, regardless of their preferred language.
English, French, and Spanish Manuals
Singer sewing machine manuals are available in English, French, and Spanish, catering to a diverse user base. These manuals provide detailed instructions for setup, maintenance, and troubleshooting, ensuring users can fully utilize their machines. Whether you’re operating a Heavy Duty model like the Singer 4452 or a Quantum Stylist like the Singer 9960, the multilingual support ensures clarity and accessibility. This inclusivity helps users worldwide to understand and optimize their sewing machine’s features, regardless of their preferred language.

Comprehensive Content in Singer Manuals
Singer manuals include detailed stitch guides, patterns, and advanced sewing techniques, providing users with a wealth of information to enhance their sewing skills and projects.
Stitch Guides and Patterns
Singer manuals offer detailed stitch guides and patterns, enabling users to explore various sewing techniques. From basic straight stitches to intricate decorative patterns, the guides provide step-by-step instructions for customization. Many manuals include charts and diagrams to help users understand stitch selection, tension adjustment, and fabric compatibility. Advanced models often feature programmable stitches, with manuals explaining how to create personalized patterns. These resources empower sewers to unlock their machine’s full potential, ensuring precise and professional results for every project.
Advanced Sewing Techniques
Singer manuals delve into advanced sewing techniques, such as quilting, embroidery, and serging, providing detailed guidance for complex projects. They offer step-by-step instructions for creating custom designs, adjusting stitch patterns, and mastering specialized sewing methods. Manuals often include tips for working with various fabrics and troubleshooting common issues. These resources are designed to help users expand their sewing skills, from intermediate to professional levels, ensuring they can tackle intricate tasks with confidence and precision using their Singer sewing machine.
Machine Updates and Firmware
Singer provides regular firmware updates to enhance machine performance, add features, and improve functionality. Manuals guide users through the update process, ensuring seamless integration of new software versions.
Updating Your Singer Sewing Machine
Singer sewing machines can be updated with the latest firmware to enhance performance and add new features. Users can download updates from Singer’s official website or through designated portals. The process typically involves connecting the machine to a computer via USB and following on-screen instructions. Regular updates ensure improved functionality, better stitch quality, and compatibility with new accessories. Always refer to the manual for specific guidance on updating your model and to verify compatibility with the latest firmware versions.
User Testimonials and Experiences
Users praise Singer sewing machine manuals for their clarity and comprehensiveness, making operation and troubleshooting effortless. Many highlight the ease of understanding complex features, while others appreciate the detailed step-by-step guides. experienced sewists commend the manuals for enhancing their skills, while beginners find them indispensable for learning. The availability of digital manuals and updates ensures users stay informed, fostering a sense of community and shared knowledge among Singer sewing machine enthusiasts.

Environmental Impact of Digital Manuals
Singer’s shift to digital manuals aligns with the Green Initiative, reducing paper usage and environmental impact. Digital formats eliminate the need for physical printing, lowering carbon emissions from production and distribution. This eco-friendly approach conserves resources and minimizes waste, promoting sustainability. Users benefit from instant access while contributing to a greener planet, reflecting Singer’s commitment to environmental responsibility and modernizing their practices for a sustainable future.
Singer sewing machine manuals are essential resources for optimal machine performance and user satisfaction. They provide detailed guidance, troubleshooting, and maintenance tips, ensuring longevity and efficiency. With digital availability, Singer supports environmental sustainability while offering convenient access. These manuals empower users to master their machines, from basic operations to advanced techniques. Singer’s commitment to comprehensive support enhances the sewing experience, making their manuals indispensable for sewists of all levels. Embrace the wealth of information to maximize your creativity and machine potential with confidence.