A 4×6 shipping label PDF is a versatile and widely used format for creating professional shipping labels․ It offers a standard size compatible with most printers and design tools like Avery and Canva, allowing easy customization with addresses, tracking info, and branding elements․ Perfect for businesses and e-commerce, these templates ensure clarity and efficiency in shipping operations․
1․1 Overview of 4×6 Shipping Labels
A 4×6 shipping label is a universally used format for efficient and professional shipping․ Measuring 4 inches in width and 6 inches in height, it provides ample space for essential details like recipient addresses, barcodes, and tracking information․ Its popularity stems from compatibility with standard printers and design tools, making it ideal for businesses and e-commerce․ Many online platforms offer free customizable templates in PDF format, enabling users to add logos, images, and specific shipping data․ This size is also supported by tools like Avery Design & Print and Canva, ensuring easy customization and printing․
1․2 Importance of Using Standard Shipping Label Sizes
Using standard shipping label sizes, such as the 4×6 format, ensures consistency and compatibility across shipping processes․ These sizes are widely recognized by carriers and printers, reducing errors and delays․ Standard labels improve readability for automated systems and carriers, ensuring accurate delivery․ They also streamline design and printing workflows, saving time and resources․ Additionally, standard sizes enhance professional presentation, making them essential for maintaining a cohesive brand image․ Adhering to these dimensions ensures seamless integration with shipping software and hardware, minimizing logistical challenges․

Key Elements of a 4×6 Shipping Label
A 4×6 shipping label includes the recipient’s address, return address, service details, tracking number, and barcode․ These elements ensure clear communication and efficient delivery processing․
2․1 Recipient and Return Address Formatting
Clear and readable formatting is essential for 4×6 shipping labels․ The recipient’s address should be prominently displayed at the top, using a standard font like Arial or Helvetica․ Ensure proper alignment, with addresses left-aligned for readability․ Include the recipient’s name, street address, city, state, and ZIP code in a single line or stacked format․ The return address should be smaller and placed in the top-left corner․ Use bold fonts for the recipient’s name and address to enhance visibility․ Always include a phone number for delivery confirmation․ Avoid using abbreviations for clarity․
2․2 Service Name and Tracking Information
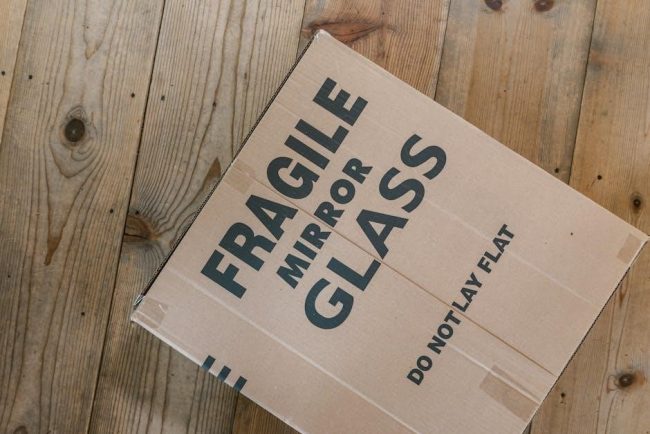
The service name, such as “Priority Mail” or “Ground Shipping,” should be clearly indicated at the top of the label․ The tracking number must be prominently displayed, often in a dedicated barcode section․ Place the service name in the top-right corner for easy identification․ Ensure the tracking number is unique and corresponds to the shipping carrier’s system․ Use a bold font for the service name and include any additional handling instructions, such as “Fragile” or “Signature Required,” below the tracking information․ This ensures seamless package tracking and delivery confirmation․
2․3 Barcode Requirements and Placement
The barcode is a critical element on a 4×6 shipping label, typically placed in the bottom-right corner for easy scanning․ Use standard formats like USPS IMpb or UPU for international shipments․ The barcode should be at least 1 inch tall and 3․25 inches wide, with a quiet zone of 0․25 inches around it․ Ensure high-resolution printing (300 DPI) and use black ink on a white background․ Avoid clutter near the barcode to prevent scanning errors․ Include a numeric translation below the barcode for manual verification if needed․ Always test the barcode with a scanner before printing in bulk․
How to Create a 4×6 Shipping Label PDF
Design your label using a template or software, add shipping details, and save as a PDF․ Ensure proper formatting and test before printing․
3․1 Using Avery Design & Print Online
Avery Design & Print Online simplifies creating 4×6 shipping labels․ Choose a pre-designed template for 4×6 labels, input recipient and sender details, and customize as needed․ Add logos, adjust fonts, and ensure all text is legible․ Preview the design to verify accuracy and layout․ Once satisfied, download the label as a PDF for printing․ Avery’s tool ensures compatibility with Avery label sheets, making it a reliable option for professional-looking shipping labels․ This method saves time and guarantees proper formatting for seamless printing․
3․2 Customizing Templates in Microsoft Word
Customizing 4×6 shipping label templates in Microsoft Word is straightforward․ Start by downloading Avery template 5292 or a comparable 4×6 label template․ Open the template and replace placeholders with your shipping details․ Use the layout tools to adjust text, add logos, or insert barcodes․ Ensure the design aligns with the label dimensions․ Save the file as a PDF for printing․ This method allows for precise customization and compatibility with Avery label sheets, ensuring professional results for your shipping needs․
3․3 Utilizing Online Label Design Tools
Online label design tools offer a convenient way to create 4×6 shipping labels․ Platforms like Canva, Zebra Designer, and LabelMaker provide user-friendly interfaces for customizing templates․ Simply select the 4×6 size, drag-and-drop elements, and input shipping details․ These tools often include pre-designed templates, barcode generators, and image upload options․ Once designed, labels can be downloaded as PDFs for printing․ This method is ideal for businesses seeking professional-looking labels without advanced design skills, ensuring consistency and efficiency in shipping operations․

Customization Options for 4×6 Shipping Labels
Customization options allow businesses to add branding, incorporate images, and adjust fonts and colors, ensuring a professional appearance while maintaining essential shipping information clarity․
4․1 Adding Logos and Branding Elements
Adding logos and branding elements to 4×6 shipping labels enhances professionalism and brand recognition․ Use high-resolution images (300 DPI) for clarity․ Place logos in corners or alongside text to avoid clutter․ Tools like Avery or Canva simplify logo integration․ Ensure branding aligns with shipping information for a balanced look․ This customization helps businesses maintain visual identity while meeting carrier requirements․ Proper scaling ensures logos remain legible without overwhelming the label․ Consistent branding fosters trust and makes packages easily identifiable during transit․
4․2 Incorporating Images and Graphics
Incorporating images and graphics on 4×6 shipping labels can enhance visual appeal and convey additional information․ Use high-resolution images (300 DPI) to ensure clarity․ Place graphics in non-essential areas to avoid obscuring critical details like addresses or barcodes․ Tools like Canva or Avery allow easy insertion of images․ Ensure graphics are relevant, such as product thumbnails or promotional icons, and maintain a professional appearance․ Avoid overloading the label with excessive visuals to keep it readable and compliant with carrier guidelines․
4․3 Adjusting Fonts and Colors for Professional Appearance
Adjusting fonts and colors on a 4×6 shipping label enhances readability and professionalism․ Use clear, sans-serif fonts for addresses and tracking numbers․ Ensure text is legible against the background by selecting high-contrast colors․ Avoid overly decorative fonts that may confuse scanners․ Tools like Avery or Canva allow customization of font sizes and colors․ Stick to a consistent color scheme that aligns with your brand․ High-resolution printing ensures sharp text and vibrant colors, making the label look polished and professional while maintaining compliance with shipping standards․

Popular Tools for Designing Shipping Labels
Popular tools include Avery Design & Print, Canva, and Google Docs add-ons, offering templates, customization, and seamless printing integration for professional 4×6 shipping labels․
5․1 Avery Template 5292 for Microsoft Word
Avery Template 5292 is a pre-designed 4×6 shipping label template optimized for Microsoft Word․ It offers a user-friendly layout with customizable fields for addresses, barcodes, and logos․ The template is specifically sized for 4×6 labels, ensuring compatibility with standard shipping label printers․ Users can easily input recipient and sender details, add tracking numbers, and adjust fonts for readability․ A preview feature allows real-time edits before printing․ This template is ideal for businesses needing professional-looking labels, streamlining the design process without requiring advanced design skills․ It’s also compatible with Avery’s online printing tools for seamless production․
5․2 Google Docs Add-Ons for Label Printing
Google Docs offers a variety of add-ons that simplify 4×6 shipping label printing․ Tools like Avery Label Merge and LabelMaker enable users to create and print labels directly from Google Docs․ These add-ons integrate seamlessly with Google Sheets for mail merge functionality, allowing businesses to batch-process labels efficiently․ They offer customizable templates, ensuring compatibility with 4×6 label sizes․ Users can easily input recipient details, tracking numbers, and logos, making the process quick and professional․ These add-ons are particularly useful for small businesses seeking cost-effective, user-friendly shipping solutions without requiring advanced design software;
5․3 Canva for Custom Label Designs
Canva is an excellent tool for creating custom 4×6 shipping labels with a professional touch․ Its user-friendly interface offers pre-designed templates tailored for shipping labels, allowing easy customization․ Users can add logos, graphics, and text while ensuring proper sizing for 4×6 formats․ Canva’s drag-and-drop editor simplifies the process, and its vast library of fonts and colors helps in maintaining brand consistency․ Once designed, labels can be downloaded as PDFs for printing․ This makes Canva a versatile option for businesses and individuals seeking visually appealing shipping labels without advanced design skills․

Printing Tips for 4×6 Shipping Labels
Use thermal printers for crisp, smudge-free prints․ Ensure high DPI for clear barcodes and text․ Align printer settings with label size for precise printing․ Use genuine label stock․
6․1 Compatible Printers for Thermal Labels
Thermal printers like Zebra ZP-450, DYMO 4XL, and Epson TM-C3400 are ideal for 4×6 shipping labels; These printers ensure crisp, high-resolution output․ Brother P-Touch and Rollo printers are also popular for their reliability and compatibility․ Use direct thermal labels to avoid ribbon costs․ Ensure printers support 4×6 dimensions for seamless printing․ Check connectivity options like USB, Ethernet, or wireless for convenient integration with shipping software․ Regularly maintain printers to prevent dust buildup and ensure consistent print quality for professional-looking labels․
6․2 Adjusting Printer Settings for Optimal Quality
For optimal 4×6 shipping label printing, adjust printer settings to ensure clarity and durability․ Set the resolution to 300 or 600 DPI for sharp text and barcodes․ Choose the correct paper type, such as thermal or matte, to match your labels․ Adjust margins to fit the 4×6 dimensions precisely․ Enable “mirror” or “rotate” options if necessary․ Use draft mode for faster printing without sacrificing quality․ Ensure the print head is aligned properly for even ink distribution․ Test settings on a sample label before bulk printing to avoid waste․

6․3 Troubleshooting Common Printing Issues
Common printing issues with 4×6 shipping labels include misalignment, blurry text, or labels not feeding properly․ Check printer alignment and recalibrate if necessary․ Ensure labels are loaded correctly, with the correct orientation․ Clean the printer head to resolve blurry text․ Verify that the label size in settings matches the 4×6 template․ Restart the printer and computer to clear software glitches․ Replace low-quality labels with compatible materials․ Consult the printer’s manual for specific troubleshooting steps to resolve persistent issues and ensure professional-quality prints․

Best Practices for Using 4×6 Shipping Labels

Always use high-quality materials and ensure accurate shipping information․ Regularly maintain printers to prevent wear and tear․ Verify label alignment before printing to avoid errors․
7․1 Ensuring High-Resolution Printing
To achieve crisp and clear 4×6 shipping labels, use high-resolution printers with a minimum of 300 DPI․ Ensure the PDF template is optimized for high-quality output․ Avoid low-resolution images or logos, as they may appear blurry when printed․ Use premium label materials designed for thermal or inkjet printers․ Verify printer settings match the label size and material type․ Test print a sample label to check for clarity and alignment before producing large batches․ This ensures professional-grade results and prevents issues during shipping․
7․2 Maintaining Accurate Shipping Information
Accurate shipping information is critical for timely delivery and customer satisfaction․ Always verify recipient addresses, ensuring proper formatting with street names, apartment numbers, ZIP codes, and country codes․ Double-check service names, tracking numbers, and package details before printing․ Use clear, legible fonts to prevent misinterpretation by automated systems or carriers․ Ensure the shipping carrier’s requirements are met, including specific formatting for addresses and barcodes․ Regularly update shipping labels with the latest information to avoid errors and delays in transit․
7․3 Regular Maintenance of Printers
Regular printer maintenance ensures optimal performance when printing 4×6 shipping labels․ Clean the print heads periodically to prevent clogged nozzles and blurry text․ Align the print heads to maintain precise label alignment․ Use compatible labels to avoid jams and ensure proper adhesion․ Update printer drivers and firmware for the latest features and bug fixes․ Check ink or toner levels to prevent faded or incomplete prints․ Dust the printer internals regularly to avoid mechanical issues․ Schedule routine maintenance to uphold print quality and prevent unexpected breakdowns during critical shipping operations․
Additional Resources for 4×6 Shipping Labels
Explore free downloadable templates, guides, and online communities for creating and printing professional 4×6 shipping labels with ease and efficiency, ensuring high-quality results․
8․1 Free Downloadable Templates
Access a variety of free downloadable 4×6 shipping label templates online, designed to simplify your shipping process․ These templates are compatible with popular software like Microsoft Word and Google Docs, allowing you to easily customize them with your shipping details․ Many websites offer pre-formatted layouts that include spaces for addresses, barcodes, and tracking information, ensuring your labels are professional and meet carrier requirements․ Downloading these templates can save you time and effort, making the label creation process straightforward and efficient․
8․2 Tutorials and Guides for Label Creation
Take advantage of step-by-step tutorials and guides available online to master the creation of 4×6 shipping labels․ These resources provide detailed instructions on designing labels, formatting text, and adding barcodes․ Many guides cater to both beginners and advanced users, covering topics like label layout, printer settings, and troubleshooting common issues․ Platforms like YouTube and shipping carrier websites often offer free video tutorials and downloadable PDF guides․ These tools help ensure your labels are professional, compliant, and easy to print, saving you time and reducing errors․
8․3 Online Communities for Shipping Solutions
Engage with online communities dedicated to shipping and logistics to find solutions and advice for creating 4×6 shipping labels․ Forums like Reddit’s r/Shipping and Facebook groups focused on e-commerce provide valuable insights and tips․ These communities often share resources, such as label templates and troubleshooting guides․ Members can offer feedback on label designs, recommend printers, and suggest software tools․ Participating in these discussions helps you stay updated on industry standards and best practices, ensuring your shipping process is efficient and professional․